What should I post more about?

Showing posts with label DIY Fashion. Show all posts

Sunday, February 6, 2011

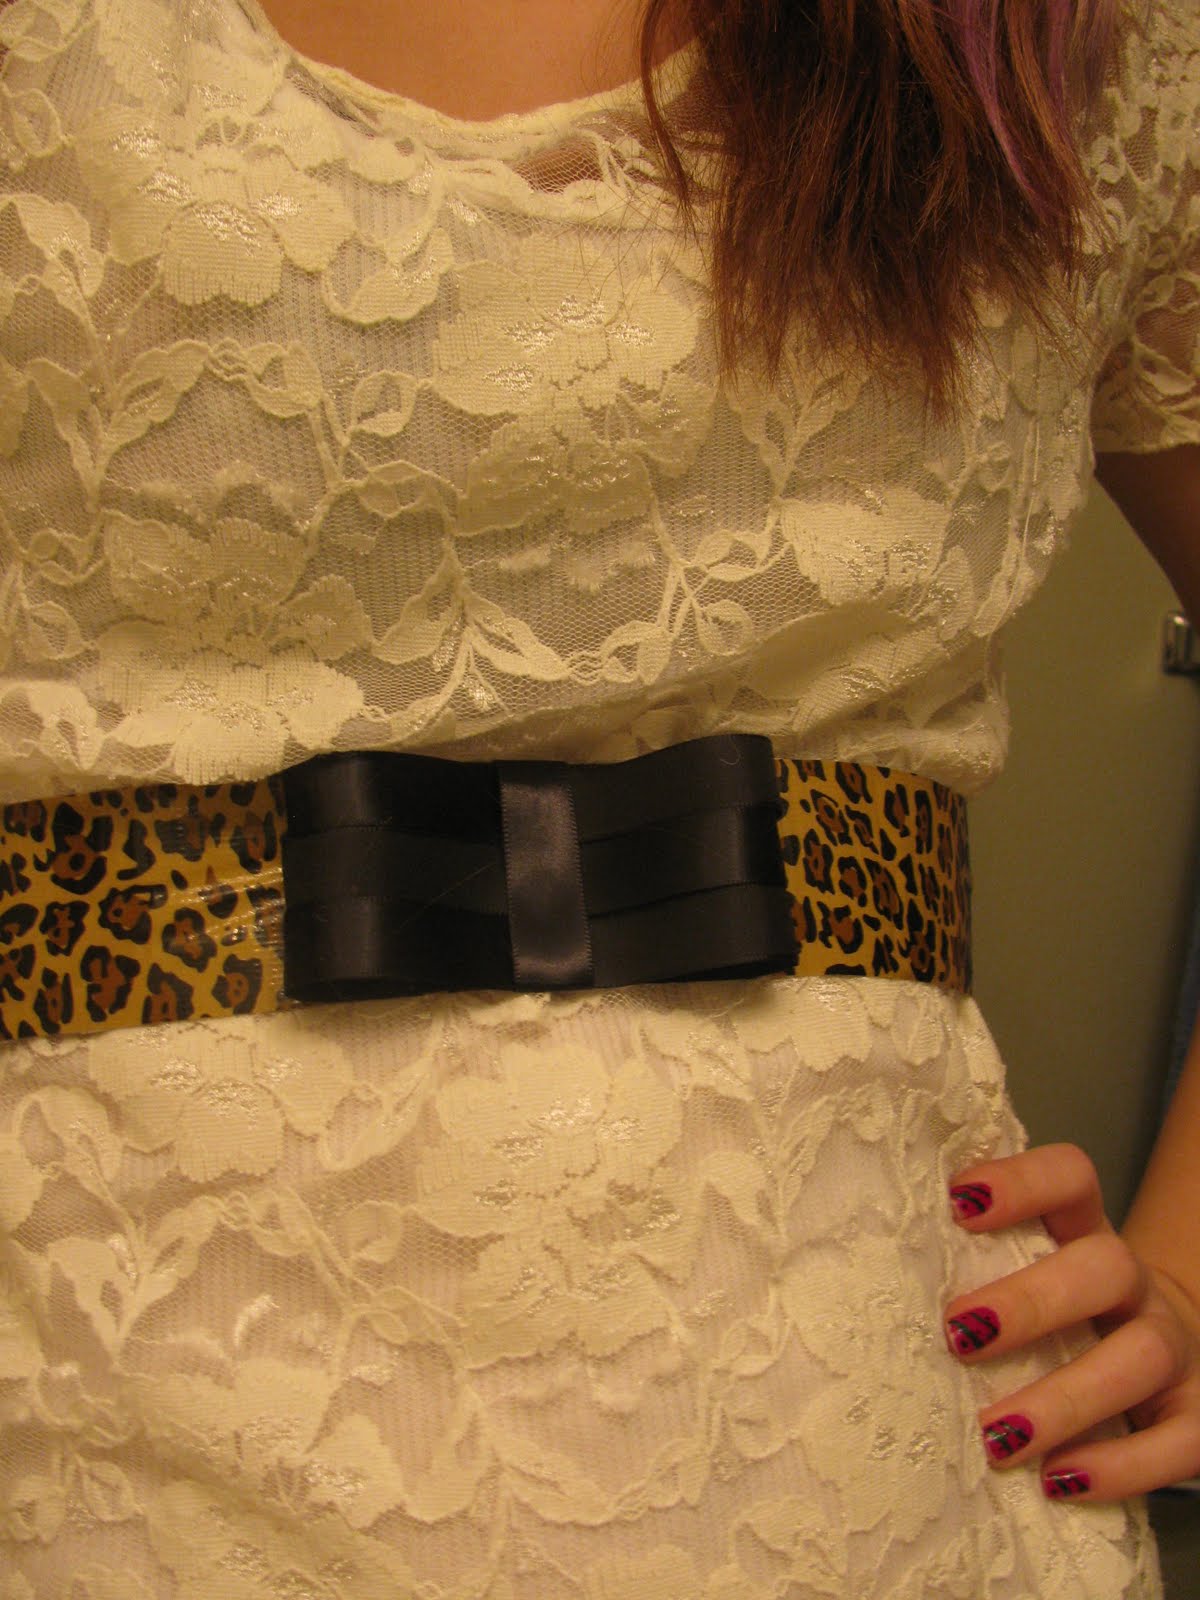
DIY Duct Tape Belt!

Anyone who knows me knows that I LOVE duct tape-I have a role in my purse at all times. So when I read about this in P.S. I made this.. (great book btw) I had to put my own twist on it!
What you need:
-Roll of cute duct tape/gorilla tape
-Ribbon
-Velcro or sew on snap buttons
-Tacky Glue or a hot glue gun

How to:
Step one-cut a strip of tape about 3 in. longer than the circumference of your waist; double up the tape so its patterned on both sides and there is no sticky stuff showing
Step two- Fold and glue the ribbon to make a bow then glue onto the tape (you can use a large ribbon or several small ribbons like I did)
Step three-Take another piece of ribbon and wrap it around the middle of the bow to create the vertical line that makes it look hand tied.
Step four-On each end you have 2 options. If you're using Velcro, glue a strip on each end to secure. If you're using snap buttons, sew 2 onto each end and make sure you have the right length to fit correctly.

As always try to make this design your own! If you want to use plain tape and a colorful ribbon or one with a design on it, go for it! You can also add embellishments like rhinestones or buttons to make it your own!
*Design credit goes to P.S. I made this by Erica Domesek

Monday, January 31, 2011

DIY turn a shirt into a purse!

Design credit goes to Seventeen Magazine, one of my favorite sources of DIY projects. This is one of the first projects I ever made and I've done it 3 more times after that! Turn that old graphic T-shirt into a purse!
What you need:
-A graphic T-shirt or tank top
-Scissors
-Needle&Thread
How to:
Step one: Cut or seem rip the sleeves off of the t shirt. This will create the arm holes for the bag. If your using a tank top, skip this step.
Step two: Flip shirt inside out and pin along the seam at the bottom of the shirt. This will be the base of the bag
Step three: Sew along the base
Step four: Turn shirt right side out
Step five: Get creative! Add beads, buttons, or other funky things to make it your own!

Sunday, January 23, 2011

DIY glitter scarf!


I was going through my old scarves and came up with this design. See what magic can happen when you go through your old stuff?
What you need:
-1 plain scarf in any color
-Pack of iron on rinestones
-Tacky glue (Best invention on earth!)
-1 tooth pick
How to:
-Pull individual rinestones off of the paper
-Squeeze a pea sized dot of tacky glue onto a paper plate
-Use tooth pick to apply glue to rinestones one at a time then use opposite side of tooth pick to push rinestone down on the edge of the scarf
-Continue in whatever pattern your heart desires!
-Let dry for 5-10 minutes

Saturday, January 22, 2011

DIY girly tank top!

I came up with this design when I was sorting through my old jewlery. It's a great way to dress up a plain tank top!
What you need:
-1 tank top
-An elastic faux pearl bracelet or necklace
-1 bow of any color
-Needle and thread
How to:
Step one: Cut elastic to detach beads
Step two: Arange beads on the shoulder of tank top leaving space for the bow.
Step three: Sew each bead (using holes left from the elastic) into the pattern you decided on, still leaving a gap for the bow.
Step four: Place bow in the space between the beads and make 2 small stitches on the base of the bow to secure it to the shirt.
Step five: Pair with a flirty skirt and pumps for a super girly get up!