I was reading Seventeen and found this fantastic organization.
If you ask any teenager, they'll tell you that prom is one of the most important parts of high school. It's a night that girls get to go out, have fun and most important, feel beautiful.
Unfortunately, poverty stands in the way of that Cinderella dream for numerous girls across the country because they can't afford a dress.
So if you have an old prom or homecoming dress that you know you won't wear again, please consider sending it to one of the nearest locations listed on the website. Lets make that dream come true!
http://www.donatemydress.org/
Saturday, February 12, 2011
Sunday, February 6, 2011
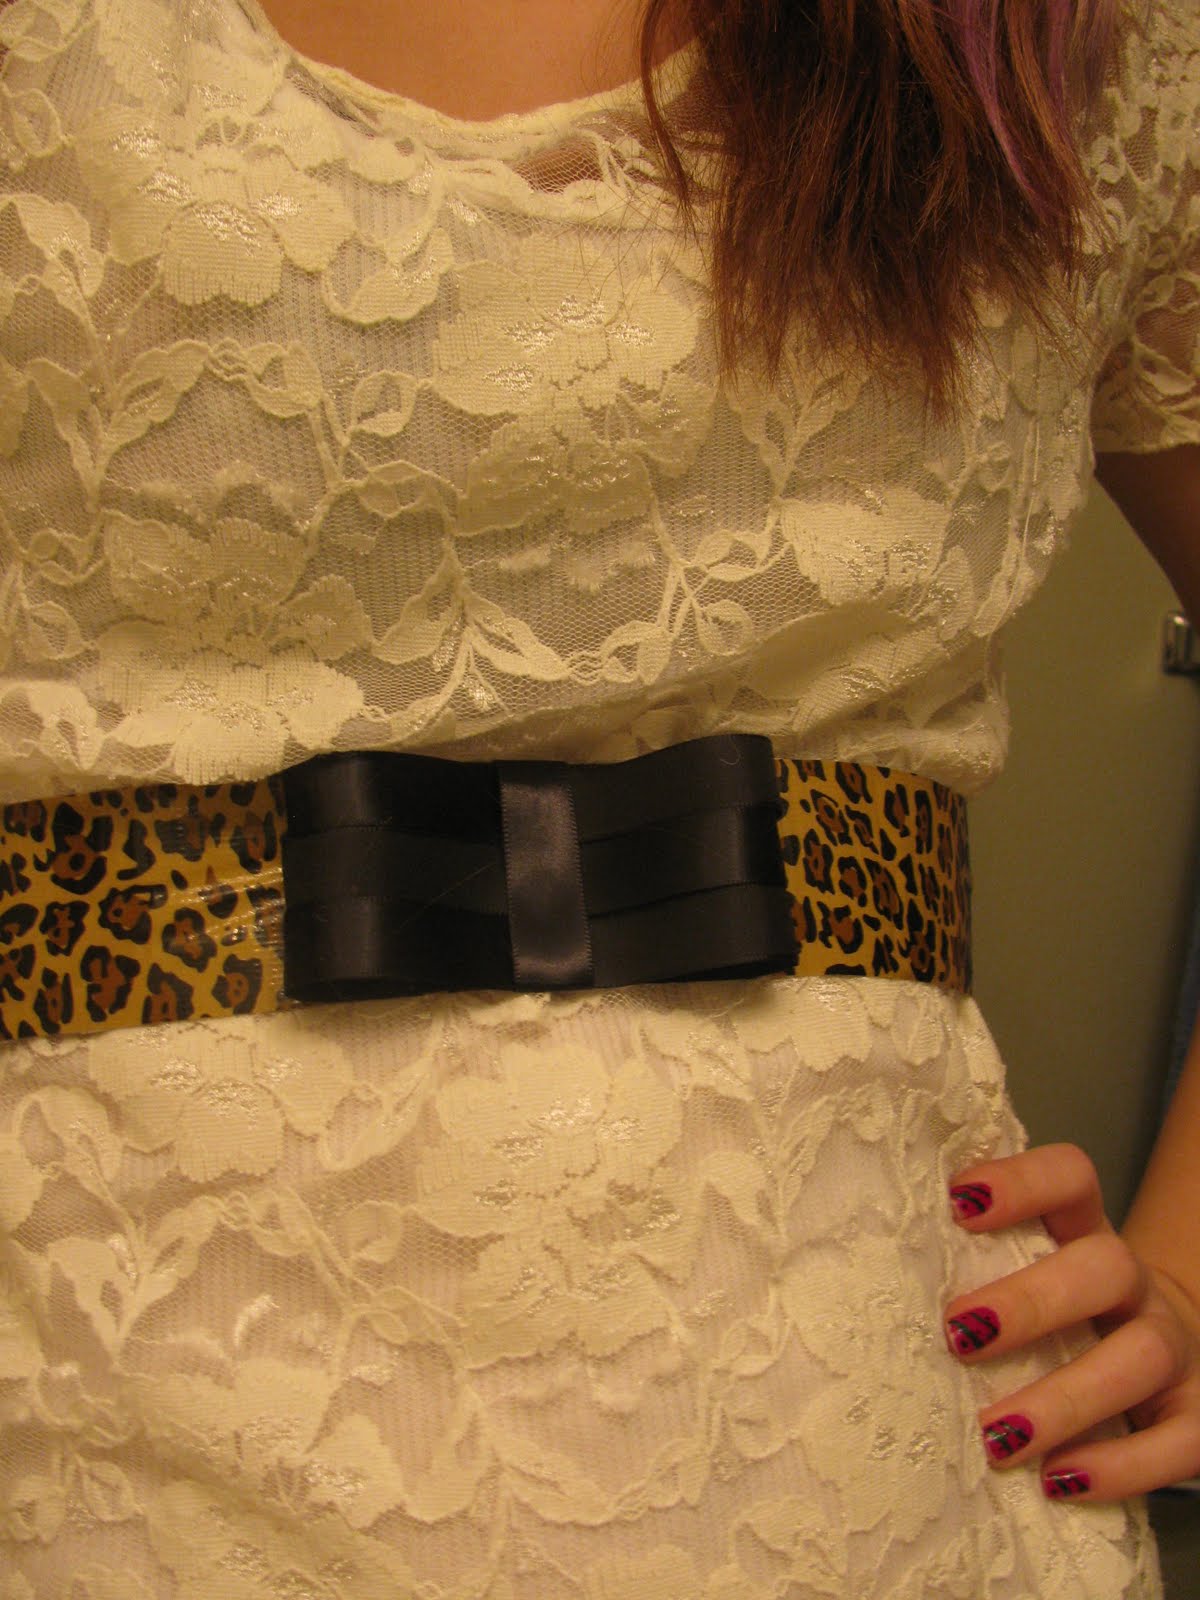
DIY Duct Tape Belt!
What you need:
-Roll of cute duct tape/gorilla tape
-Ribbon
-Velcro or sew on snap buttons
-Tacky Glue or a hot glue gun
How to:
Step one-cut a strip of tape about 3 in. longer than the circumference of your waist; double up the tape so its patterned on both sides and there is no sticky stuff showing
Step two- Fold and glue the ribbon to make a bow then glue onto the tape (you can use a large ribbon or several small ribbons like I did)
Step three-Take another piece of ribbon and wrap it around the middle of the bow to create the vertical line that makes it look hand tied.
Step four-On each end you have 2 options. If you're using Velcro, glue a strip on each end to secure. If you're using snap buttons, sew 2 onto each end and make sure you have the right length to fit correctly.
As always try to make this design your own! If you want to use plain tape and a colorful ribbon or one with a design on it, go for it! You can also add embellishments like rhinestones or buttons to make it your own!
*Design credit goes to P.S. I made this by Erica Domesek
Monday, January 31, 2011
DIY turn a shirt into a purse!

What you need:
-A graphic T-shirt or tank top
-Scissors
-Needle&Thread
How to:
Step one: Cut or seem rip the sleeves off of the t shirt. This will create the arm holes for the bag. If your using a tank top, skip this step.
Step two: Flip shirt inside out and pin along the seam at the bottom of the shirt. This will be the base of the bag
Step three: Sew along the base
Step four: Turn shirt right side out
Step five: Get creative! Add beads, buttons, or other funky things to make it your own!
Trend Alert! Funky Nails.

We can thank Katy Perry and Beyonce for this new beauty trend! Crazy patterned and neon nails are taking over the red carpet.
Because this is a very versatile trend, there are tons of ways to make it your own.
I went with stripes and polka dots at the same time. I did a magenta base, with black polka dots and emerald green stripes.
Other options are a neon color by itself, polka dots, stripes, flowers, alternating colors or if you want to be really different, my favorite is to have the thumbs a different color than the rest of my nails. If you wanna take an extra risk, a style I love that my friend Rebekah does is a stained glass pattern with crazy colors and white borders.
P.S. For designs, use a tooth pick:)
Saturday, January 29, 2011
Trend alert!:Rock star glamour

The punk look uses lots of grey and black with some random pops of color like red.
The accessories are the best part with lots of studs and silver chains, like the studded belt in this picture.
If you are kind of put off by the full out rebel look, try adding simple accessories like these to every day outfits to give it just enough edge.
Wednesday, January 26, 2011
Pull off a pajama day, and still look cute!

We all have them whether it's finals week or we're coming down with a cold. So I decided to come up with a comfy style that feels like your still in bed!
Start with a pair of yoga pants. I swear by the Victoria's Secret line, they are heavenly!
Find a solid tank top and layer it with a comfy zip up hoodie.
Then, for extra spunk, add a fun colored or patterend scarf, (They're huge right now)
Pull your hair back in a messy bun and get away with minimal make up.
And there you go! You're still super comfortable, but leave that ragged old sleep shirt at home!
Monday, January 24, 2011
Etsy Blog, Check it out!
http://www.etsy.com/
Hey guys! I found this super cool website call Etsy.com. It's a site that sells vintage and handmade clothes and accessories! I'm gonna start posting some of the stuff I make, but check it out to see what cool one of a kind stuff they have! I love it!
Hey guys! I found this super cool website call Etsy.com. It's a site that sells vintage and handmade clothes and accessories! I'm gonna start posting some of the stuff I make, but check it out to see what cool one of a kind stuff they have! I love it!
Sunday, January 23, 2011
DIY glitter scarf!

I was going through my old scarves and came up with this design. See what magic can happen when you go through your old stuff?
What you need:
-1 plain scarf in any color
-Pack of iron on rinestones
-Tacky glue (Best invention on earth!)
-1 tooth pick
How to:
-Pull individual rinestones off of the paper
-Squeeze a pea sized dot of tacky glue onto a paper plate
-Use tooth pick to apply glue to rinestones one at a time then use opposite side of tooth pick to push rinestone down on the edge of the scarf
-Continue in whatever pattern your heart desires!
-Let dry for 5-10 minutes
Saturday, January 22, 2011
DIY girly tank top!

What you need:
-1 tank top
-An elastic faux pearl bracelet or necklace
-1 bow of any color
-Needle and thread
How to:
Step one: Cut elastic to detach beads
Step two: Arange beads on the shoulder of tank top leaving space for the bow.
Step three: Sew each bead (using holes left from the elastic) into the pattern you decided on, still leaving a gap for the bow.
Step four: Place bow in the space between the beads and make 2 small stitches on the base of the bow to secure it to the shirt.
Step five: Pair with a flirty skirt and pumps for a super girly get up!
Subscribe to:
Comments (Atom)